

This guide covers Claude Desktop setup. For other AI clients, see our client compatibility guide.
Prerequisites
Before you begin, make sure you have:Claude Desktop
Download and install Claude Desktop (Pro or Team plan required for MCP connectors)
Civic Account
Create a free account on app.civic.com
Step 1: Set Up Your Civic Account
If you haven’t already, create your account and select your tools at app.civic.com:1
Create a free Civic account
Go to app.civic.com and sign in with Google, GitHub, or email.
2
Select your MCP servers
During onboarding, choose which services you want your AI to access — GitHub, Slack, Google Workspace, Dropbox, and more. This creates your default toolkit.
3
Get your MCP URL
Your connection URL is the same for every Civic account:The URL is not personalized — what makes it yours is authentication. When you connect your client and complete the OAuth flow, Civic links that session to your account and toolkit.
The MCP URL (
https://app.civic.com/hub/mcp) is the same for every Civic user. What makes it yours is authentication — when you click Connect in Claude Desktop, a browser window opens to app.civic.com and links that session to your account and toolkit.Step 2: Add MCP Server in Claude Desktop
1
Open Claude Desktop Settings
- In Claude Desktop, click on Settings (usually in the bottom left or profile menu)
- Navigate to Connectors
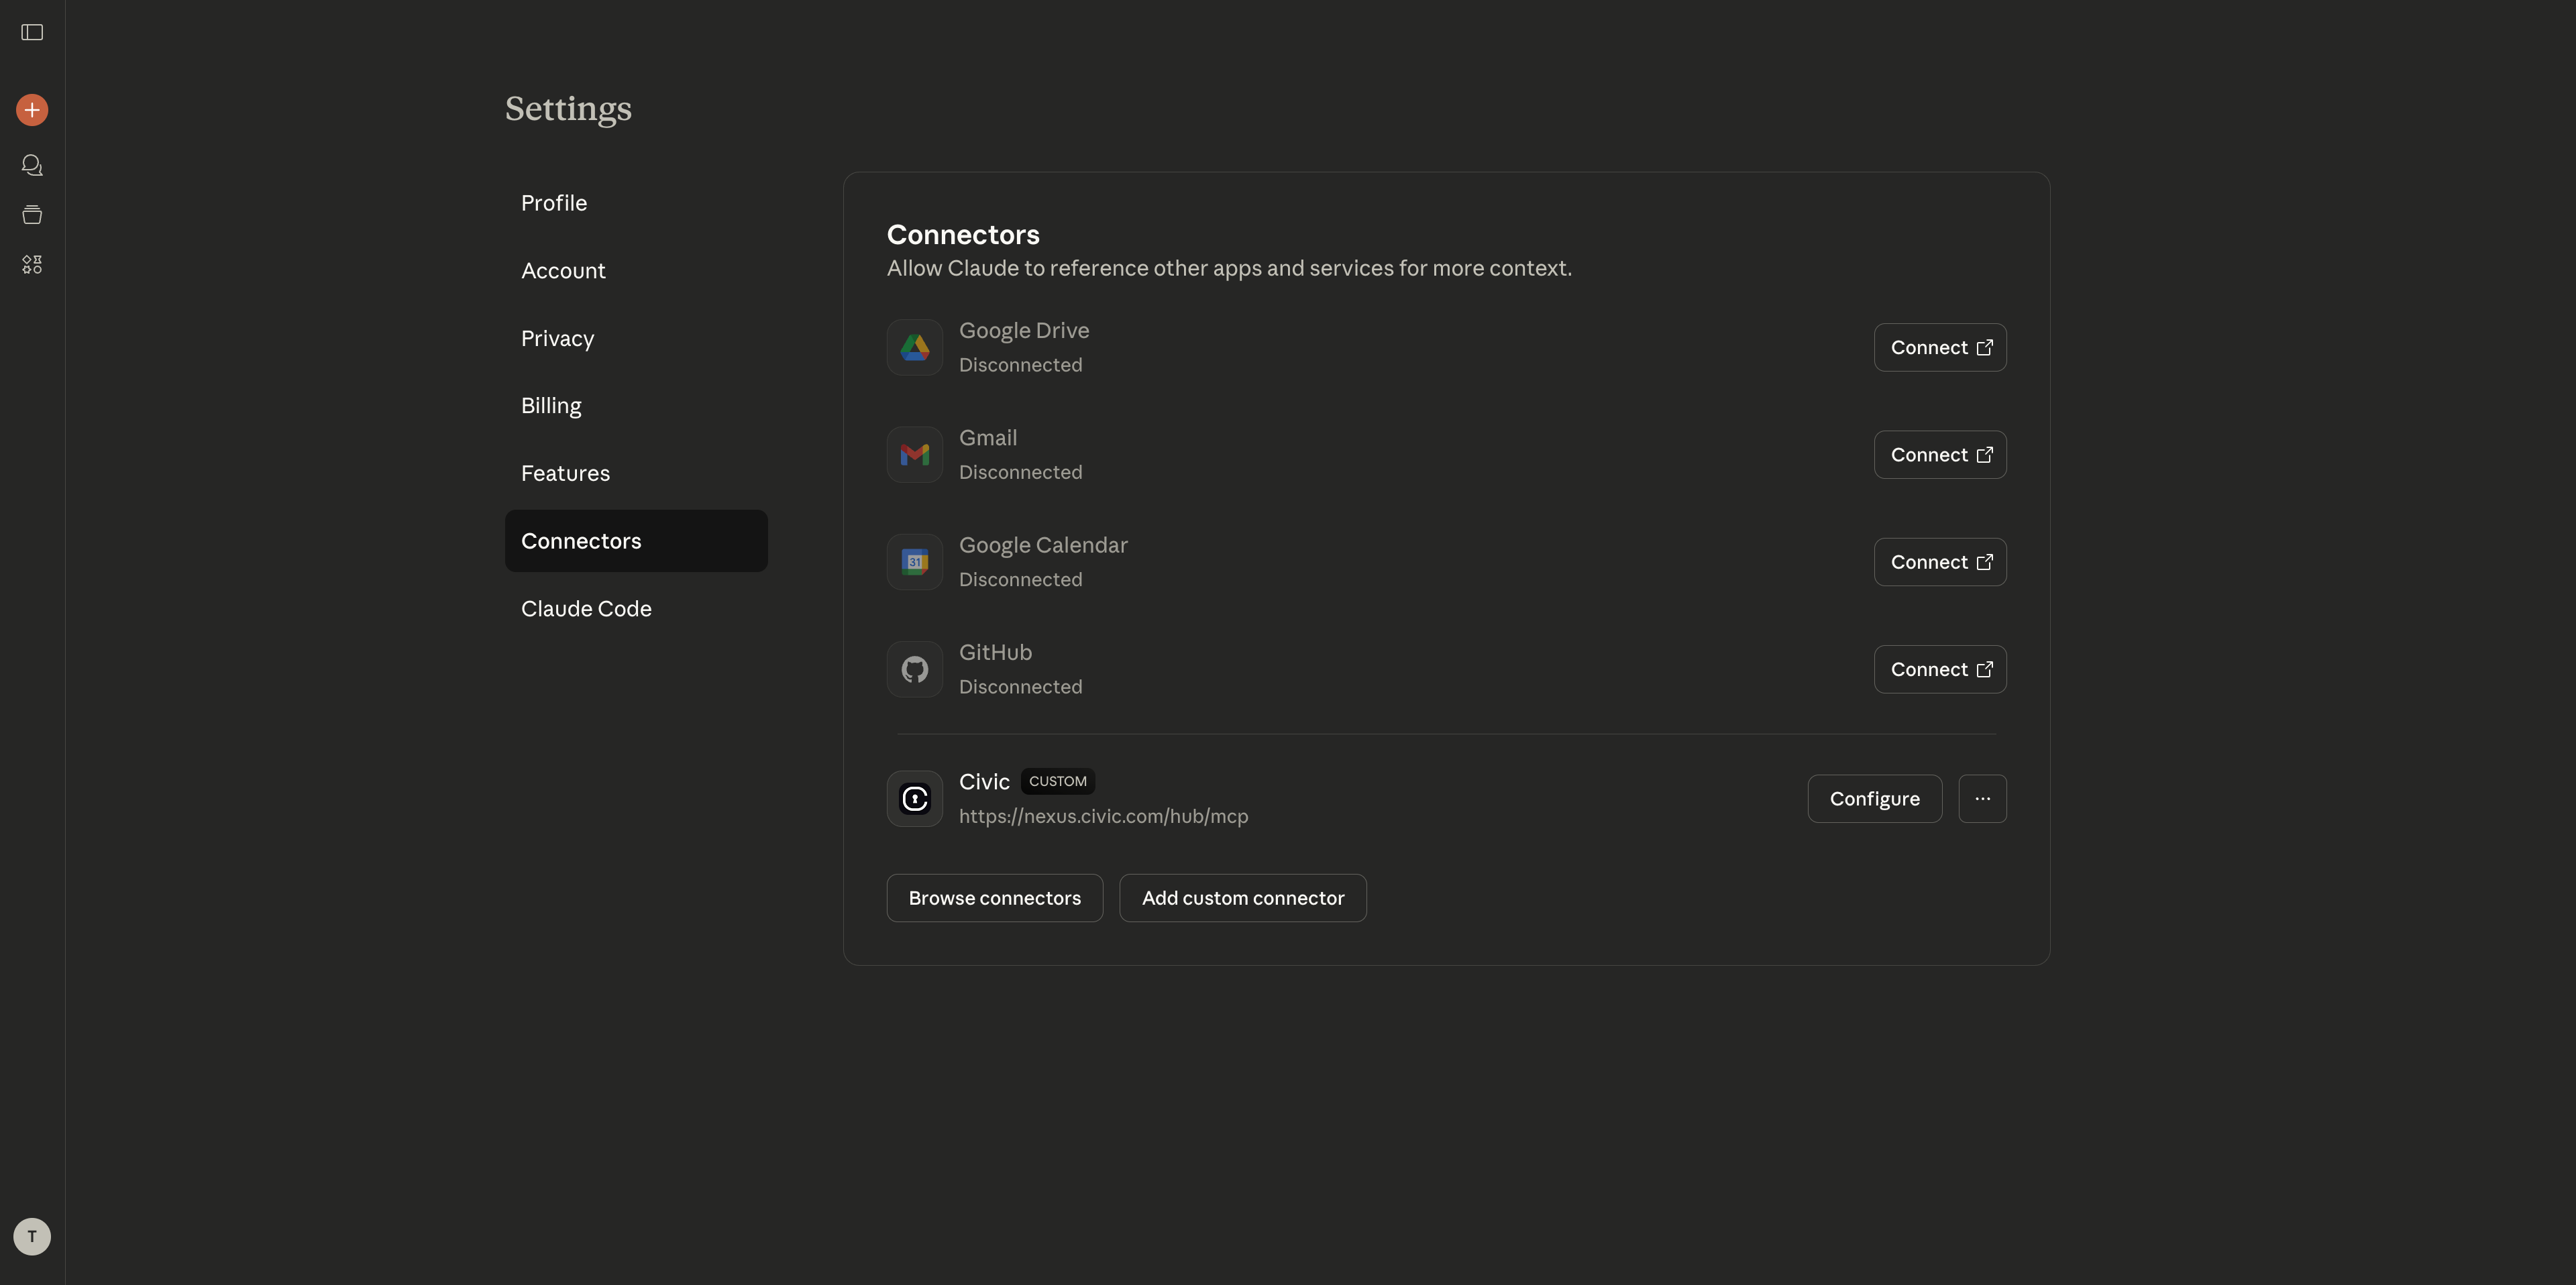
Claude Desktop Settings showing Connectors section
2
Add Custom Connector
- Click “Add Custom Connector”
- Enter a name: “Civic”
- In “Remote MCP server URL” field, paste:
https://app.civic.com/hub/mcp - Click “Add” to confirm
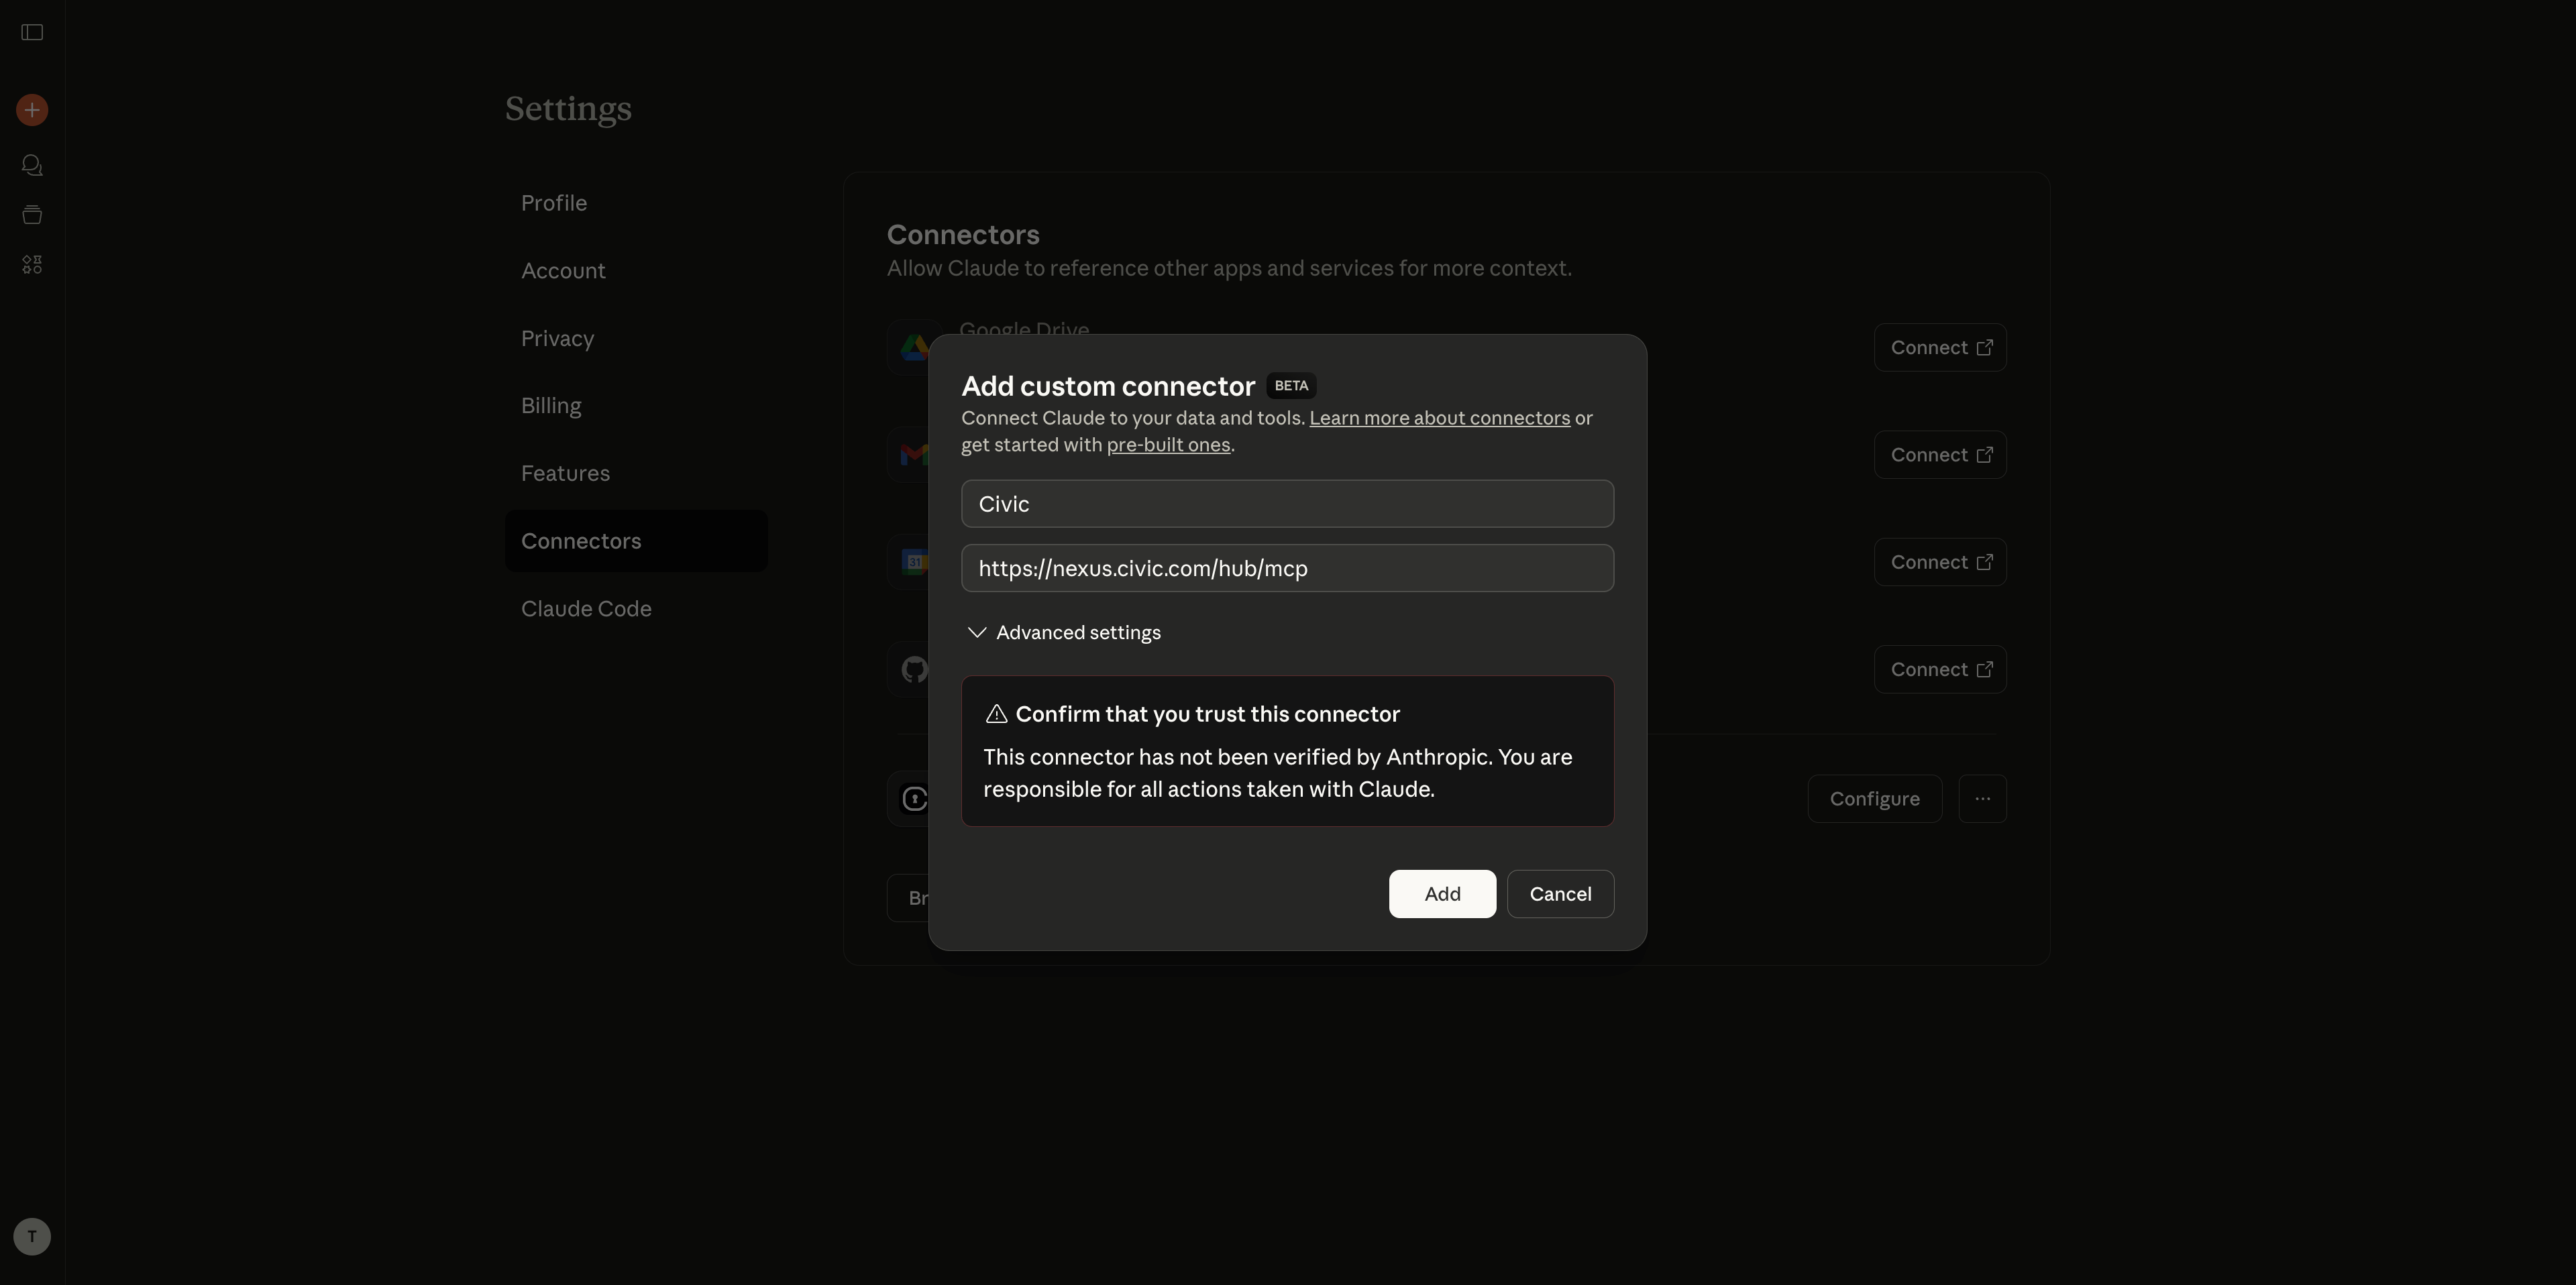
Adding a custom MCP connector in Claude Desktop
3
Connect and Authenticate
- The connector will appear in your list with a “Connect” button
- Click “Connect” to begin authentication
- Follow on-screen instructions to authorize access to your selected services
- Return to Settings > Connectors to verify it shows as “Connected”
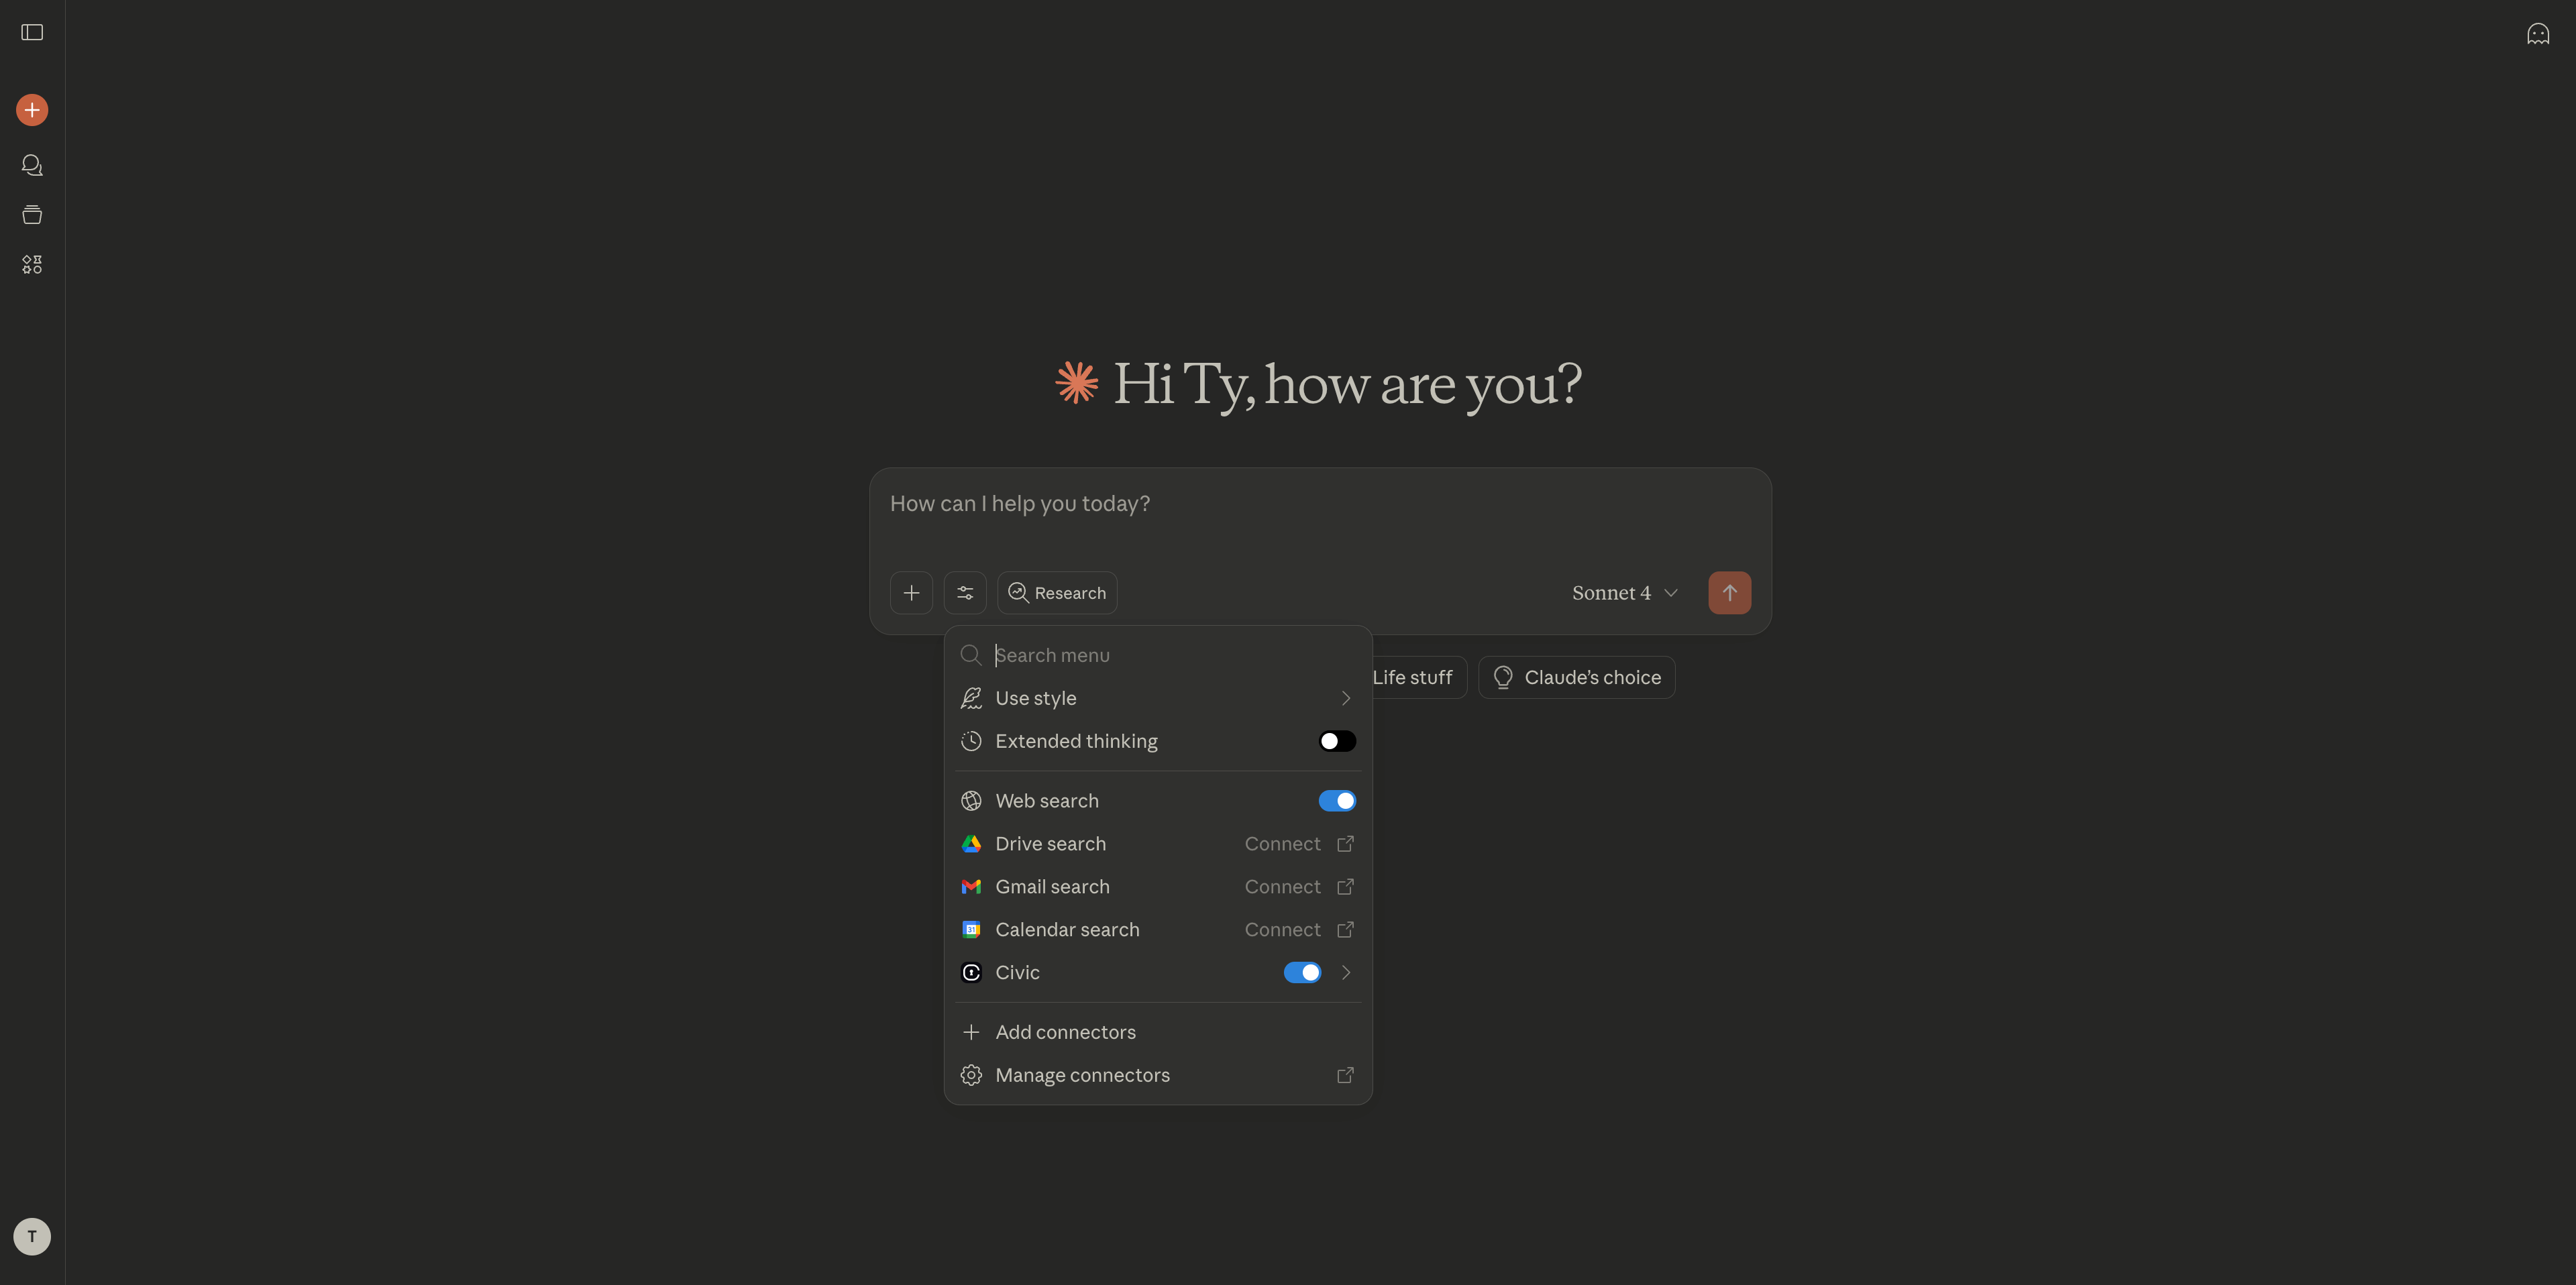
Claude Desktop connector successfully connected
Step 3: Test Your Connection
Try these commands to verify everything is working: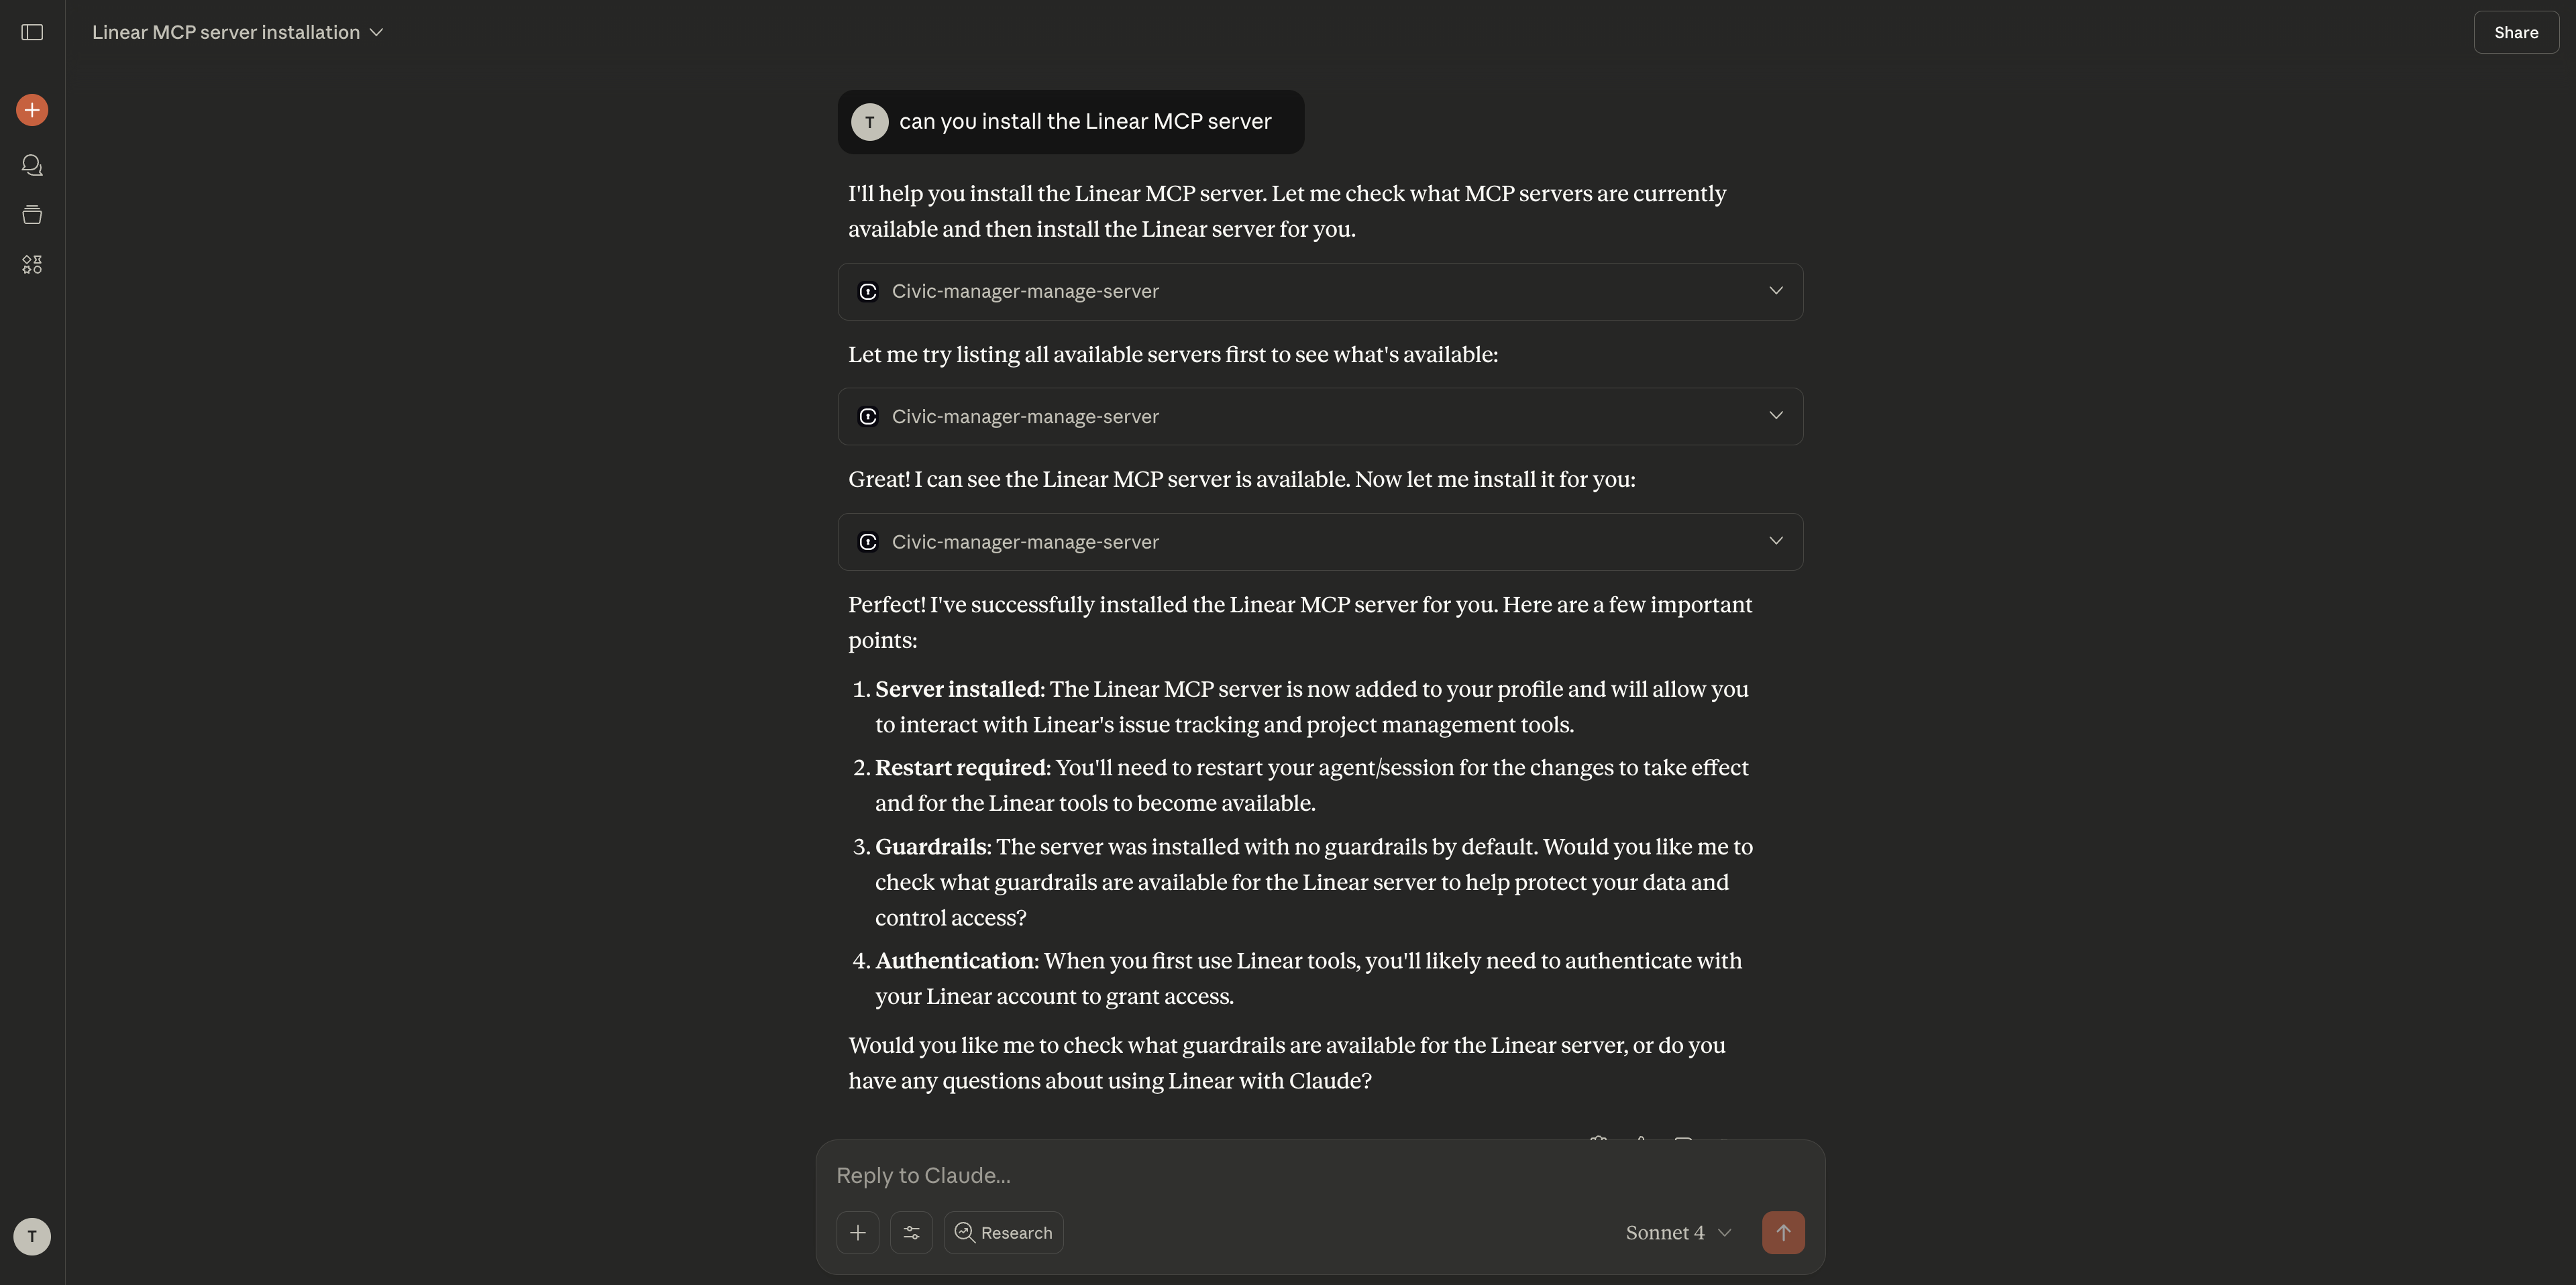
Claude Desktop successfully using connected tools
Managing Your Tools
Adding More Tools
You can add new tools directly in your Claude Desktop chat:Alternative Method: Hub Bridge (Free Users)
If you don’t have Claude Pro, Team, or Enterprise, you won’t have access to MCP connectors in the UI. Use Hub Bridge instead:What is Hub Bridge? Hub Bridge (
@civic/hub-bridge) is a lightweight local proxy that runs on your machine via npx and bridges stdio-only MCP clients to Civic’s remote HTTP endpoint. Use it when your client doesn’t support remote HTTP MCP connections natively. If your client supports HTTP/Streamable HTTP MCP — use that instead (it’s simpler and has no Node.js dependency).Full Hub Bridge setup guide →1
Open configuration file
- In Claude Desktop, go to Settings
- Click the Developer tab
- Click Edit Config to open
claude_desktop_config.json
2
Add Hub Bridge configuration
Add this to your config file:
This uses the Hub Bridge method which works with any Claude Desktop version, including free.
3
Save and restart
- Save the config file
- Restart Claude Desktop for changes to take effect
4
First-time setup
When you first use an MCP command, Hub Bridge opens a browser window to app.civic.com. Sign in to authenticate. If you haven’t created a Civic account yet, you’ll be walked through tool selection during sign-up.
Removing Tools
You can disconnect from specific tools directly in chat:Managing the Entire Connector
To remove the Civic connector completely:1
Access connectors
Go to Settings > Connectors in Claude Desktop
2
Remove connector
- Find “Civic” in your connectors list
- Click Remove or Delete next to the connector
- Confirm the removal when prompted
3
Clean up (optional)
Visit app.civic.com to revoke service authorizations if you no longer want Civic to have access
Common Questions
Do I need a paid Claude plan?
Do I need a paid Claude plan?
Yes, MCP connectors are currently only available on Claude Pro and Team plans. The free Claude plan doesn’t support external integrations.
What if authentication fails?
What if authentication fails?
If you encounter authentication issues:
- Make sure you’re logged into the correct account for the service
- Check if your account email matches between app.civic.com and the service
- Try removing and re-adding the MCP connector with a fresh URL
- Check our troubleshooting guide for more solutions
Can I use different email addresses?
Can I use different email addresses?
If your app.civic.com account uses a different email than your connected services (e.g., work@company.com vs personal@gmail.com), make sure you authenticate with the correct account for each service during the OAuth flow.
My connector shows as disconnected
My connector shows as disconnected
Try these steps:
- Update Claude Desktop to the latest version
- Remove the connector completely and re-add with a fresh MCP URL
- Check that your system allows Claude network access
- Restart Claude Desktop after making changes
Two-Minute Verification
Once connected, test these prompts to make sure everything works:- If you selected GitHub
- If you selected Slack
- If you selected Dropbox
Need Help?
Troubleshooting Guide
Solutions for common Claude Desktop connection issues
Next Steps
Now that you’re connected, explore what you can do:Browse More Servers
Add more MCP servers to expand Claude’s capabilities
Security Details
Learn how Civic keeps your data secure
Installing into an agent
Deploy Civic in autonomous agents and automation platforms
Client compatibility
See setup guides for other AI clients